1.2" 4-Digit 7-Segment LED Display
Adafruit Product #1270 1.2" tall, 4 digit, 7 segment, display. Communication via I2C (address of 0x70 to 0x77, selectable with jumpers). It prefers 5V power and 5V logic. Don't forget to set the jumper between the backpack 'IO' pin and +5V to indicate I2C will be 5V logic.
You can connect up to 8x of these displays to the same I2C bus. Wiring to the I2C SDA & SCL pins is simple. You change the display I2C address by soldering over the A0, A1, A2 jumpers in a combination that achieves the desired address of 0x70, 0x71, 0x72, 0x73, 0x74, 0x75, 0x76, 0x77.
| Address | Short These Jumpers |
|---|---|
| 0x70 | (none) |
| 0x71 | A0 |
| 0x72 | A1 |
| 0x73 | A0 & A1 |
| 0x74 | A2 |
| 0x75 | A0 & A2 |
| 0x76 | A1 & A2 |
| 0x77 | A0 & A1 & A2 |
At full brightness, I measured a maximum current consumption of less than 31 mA (spikes may be higher). (The Arduino UNO 5V connection can provide up to 400 mA when power is supplied to the UNO USB Type B connection)
Download the Adafruit LED Backpack library and the Adafruit GFX library from the Arduino library manager.
See a project using this display.
////////////////////////////////////////////////////////////////////////
// Adafruit 7-segment LED matrix backpacks
// Demonstrates how to use all of the Adafruit library functions.
// Mark Kiehl
//
// Portions derived from Adafruit examples.
/***************************************************

  Adafruit 7-segment LED matrix backpacks
  HT16K33

  AF #865; 0.56"; 7-seg clock display; + #877 backpack
  AF #1264; 1.2"; 7-seg clock display; + #1271 backpack

  This is a library for our I2C LED Backpacks

  Adafruit tutorial:
  https://learn.adafruit.com/adafruit-led-backpack/0-dot-56-seven-segment-backpack

  Designed specifically to work with the Adafruit LED 7-Segment backpacks
  ----> http://www.adafruit.com/products/881
  ----> http://www.adafruit.com/products/880
  ----> http://www.adafruit.com/products/879
  ----> http://www.adafruit.com/products/878

  These displays use I2C to communicate, 2 pins are required to
  interface. There are multiple selectable I2C addresses. For backpacks
  with 2 Address Select pins: 0x70, 0x71, 0x72 or 0x73. For backpacks
  with 3 Address Select pins: 0x70 thru 0x77

  Adafruit invests time and resources providing this open source code,
  please support Adafruit and open-source hardware by purchasing
  products from Adafruit!

  Written by Limor Fried/Ladyada for Adafruit Industries.
  BSD license, all text above must be included in any redistribution
 ****************************************************/

// Enable one of these two #includes and comment out the other.
// Conditional #include doesn't work due to Arduino IDE shenanigans.
#include <Wire.h> // Enable this line if using Arduino Uno, Mega, etc.
//#include <TinyWireM.h> // Enable this line if using Adafruit Trinket, Gemma, etc.
#include "Adafruit_LEDBackpack.h"
#include "Adafruit_GFX.h"
Adafruit_7segment matrix = Adafruit_7segment();
bool blinkColon = false;
int hours = 0;
int minutes = 0;
int seconds = 0;
////////////////////////////////////////////////////////////////////////

void setup() {

  //Adafruit 7-segment backpack
  #ifndef __AVR_ATtiny85__
    Serial.begin(9600);
    Serial.println("7 Segment Backpack Test");
  #endif
  matrix.begin(0x70);

  MatrixTest();

  //print a decimal number
  matrix.clear();
  matrix.print(3456,DEC);
  matrix.writeDisplay();
  delay(5000);

  //print a hexadecimal number
  matrix.clear();
  matrix.print(0xBEEF,HEX);
  matrix.writeDisplay();
  delay(5000);

  //try to print a number thats too long
  //result is "----"
  matrix.clear();
  matrix.print(12345, DEC);
  matrix.writeDisplay();
  delay(5000);

  //Draw a raw 8-bit mask using writeDigitRaw(location,bitmask);
  //The segments are labelded A to G.  These correspond to bits
  //in the bitmask, starting with A as the low-order bit.
  //Bitmasks can be specified as 8-bit binary numbers using
  //the "B" notation.  To turn on segment A (the top segment) in
  //the first position, you would call:
  matrix.clear();
  matrix.writeDigitRaw(0,B00000001);
  matrix.writeDisplay();
  delay(5000);
  //To turn on segments C,G,E, and F (to make an 'h')
  //you would call:
  matrix.clear();
  matrix.writeDigitRaw(0,B01110100);
  matrix.writeDisplay();
  delay(5000);


  // writeDigitNum(location, number) - this will write the number (0-9) to a single location.
  // Location #0 is all the way to the left
  // Location #2 is the colon dots;  use drawColon(true or false)
  // Location #4 is all the way to the right.
  // Write the time 23:40
  matrix.clear();
  matrix.writeDigitNum(0,2);
  matrix.writeDigitNum(1,3);
  matrix.drawColon(true);
  matrix.writeDigitNum(3,4);
  matrix.writeDigitNum(4,5);
  matrix.writeDisplay();
  delay(5000);

  //Note missing digit at position 0
  //The .clear() insures position 0 does not still have last value.
  //Note that the colon is not visible either.
  matrix.clear();
  matrix.print(2.34);
  matrix.setBrightness(7);
  matrix.writeDisplay();
  delay(5000);

  // Must execute .writeDisplay() after .clear()
  matrix.clear();
  matrix.writeDisplay();
  delay(5000);

  matrix.writeDisplay();
  matrix.writeDigitNum(0,9);
  matrix.writeDigitNum(1,8);
  matrix.drawColon(false);
  matrix.writeDigitNum(3,7);
  matrix.writeDigitNum(4,6);
  matrix.writeDisplay();
  delay(5000);

  // change the brightness; 0 = low, 15 = bright
  matrix.setBrightness(0);
  delay(2000);

  // change the brightness; 0 = low, 15 = bright
  matrix.setBrightness(15);
  delay(2000);

  // change the brightness; 0 = low, 15 = bright
  matrix.setBrightness(7);
  delay(2000);

  // blink at rate = 1 (fastest)
  matrix.blinkRate(1);
  delay(5000);

  // blink at rate = 2
  matrix.blinkRate(2);
  delay(5000);

  // blink at rate = 3  (slowest)
  matrix.blinkRate(3);
  delay(5000);

  // blink at rate = 0 (no blink)
  matrix.writeDisplay();
  matrix.writeDigitNum(0,4);
  matrix.writeDigitNum(1,5);
  matrix.drawColon(false);
  matrix.writeDigitNum(3,6);
  matrix.writeDigitNum(4,7);
  // matrix.writeDisplay(); not needed when .blinkRate() is used
  matrix.blinkRate(0);
  delay(5000);

  //writeDigitNum(location, number, true) will paint the decimal point.
  matrix.writeDisplay();
  matrix.writeDigitNum(0,8,true);
  matrix.writeDigitNum(1,7,true);
  matrix.writeDigitNum(3,6,true);
  matrix.writeDigitNum(4,5,true);
  matrix.writeDisplay();
  delay(5000);

  //writeDigitNum(location, number, true) will paint the decimal point.
  matrix.writeDisplay();
  matrix.writeDigitNum(0,8,false);
  matrix.writeDigitNum(1,7,false);
  matrix.writeDigitNum(3,6,false);
  matrix.writeDigitNum(4,5,false);
  matrix.writeDisplay();
  delay(5000);
}

void loop() {

  // blink the colon every 1 second.
  blinkColon = !blinkColon;
  matrix.drawColon(blinkColon);
  matrix.writeDisplay();
  delay(1000);

} // loop()

void MatrixTest(){
  // A quick test that the 7-segment LED is working.
  uint8_t counter = 0;
  for (uint8_t d=0; d<25; d++) {
    // paint one LED per row. The HT16K33 internal memory looks like
    // a 8x16 bit matrix (8 rows, 16 columns)
    for (uint8_t i=0; i<8; i++) {
      // draw a diagonal row of pixels
      matrix.displaybuffer[i] = _BV((counter+i) % 16) | _BV((counter+i+8) % 16)  ;
    }
    // write the changes we just made to the display
    matrix.writeDisplay();
    delay(100);
    counter++;
    if (counter >= 16) counter = 0;
    delay(1);
  }
  // Must execute .writeDisplay() after .clear()
  matrix.clear();
  matrix.writeDisplay();
} // MatrixTest()
Do you need help developing or customizing a IoT product for your needs? Send me an email requesting a free one hour phone / web share consultation.
The information presented on this website is for the author's use only. Use of this information by anyone other than the author is offered as guidelines and non-professional advice only. No liability is assumed by the author or this web site.
Sensors
Sensor Calibration
Sensitivity, Resolution, Response Time, etc.

50000 PPM (5%) CO2 Sensors

MQ Gas Sensors

MQ-6 LPG Gas Sensor

MQ-7 Carbon Monoxide Gas Sensor
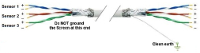
Sensor to microcontroller / data acquisition device cables

Accelerometers
IMU / Gyroscope
Magnetometer

Audio
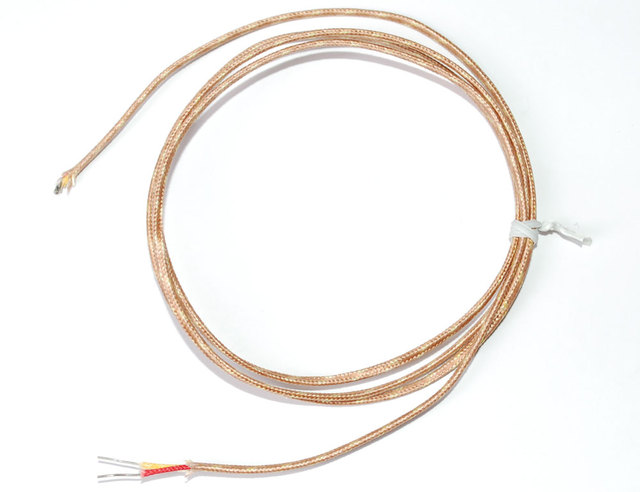
Thermocouple

AF Sensirion SHT40 Temperature & Humidity Sensor
.svg)
Motion Sensors
.png "object detection sensors")
Object Detection Sensors

Strain Gauge

Color
.png)
Pressure
Liquid Flow Meter

Operational Amplifiers
Components

Tools
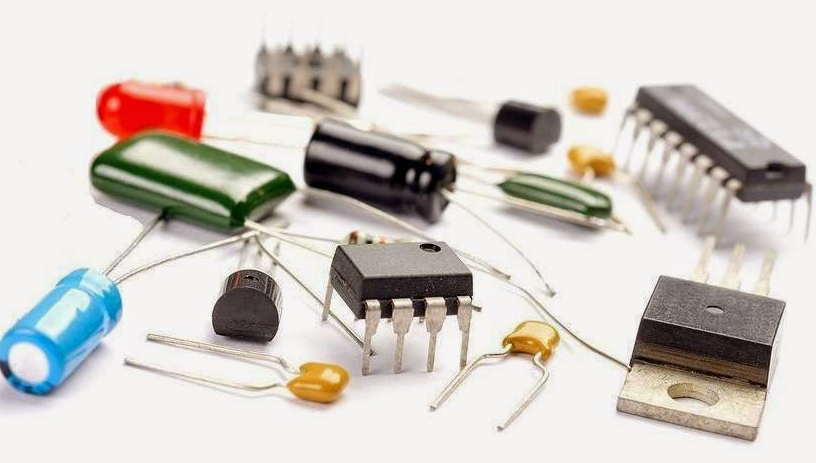
Basic Components

Suppliers

VAC

XBee I/O Line Passing
xBee wireless communication modules + Arduino

I2C bus / SPI / 1-Wire
.png)
UART TTL Serial RS-232
.png)
LoRa Communications

Triac
Light Emitting Diode (LED)

NeoPixels
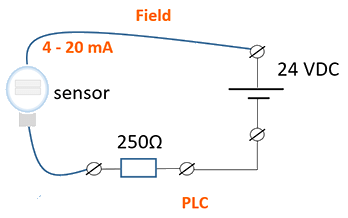
4-20 mA Current Loops
.png)
Human Health & Electrical Power
HMI
")
Mobile Apps
Hall Effect Sensor
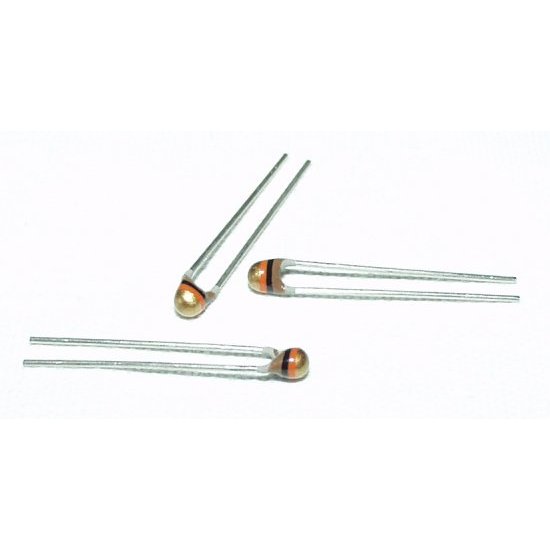
NTC Thermistor
.png "Op Amp - operational amplifier. Amplify, filter, add, manipulate analog signals.")
Amplify an Analog Signal

Offset a input signal
.png)
Electric Motors
.jpg)
Laptop 12V Power Supply

MCP2515 CAN Bus Module
.png)
TJA1050 CAN Bus Module

1.2" 4-Digit 7-Segment LED Display

Batteries

2022 Character Display Comparison
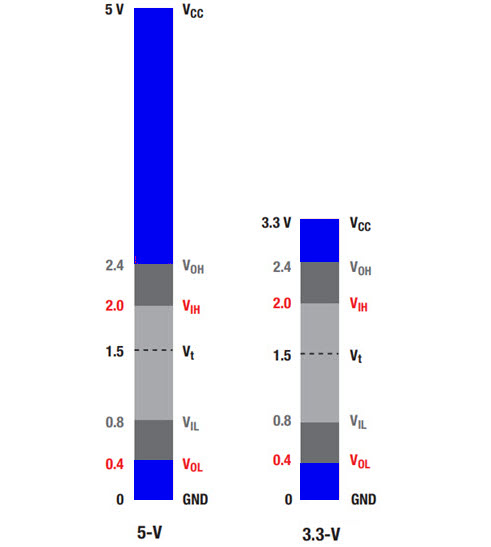
Logic Level Converter
.png)
Circuit Protection
Diodes
.jpg)
PMOS / P-Channel MOSFET

Logic Level NMOS / N-Channel MOSFET
Voltage Measurement

Analog to Digital Conversion (ADC)

Variable output VDC
.png)
Turn On/Off Noisy DC Device

ADC Analog Input