Particle Particle Integrations (webhooks)
This tutorial is intended to provide you with the best practices for creating a Particle integration / webhook. The examples provided will include the publishing of at least two key/value pairs from the Particle device to the webhook, and transfer of that data to the destination external cloud service. Hereafter, the term 'webhook' in in this article will refer to a Particle integration, and 'destination' will refer to the cloud service that the webhook is pushing data to.
You can create a webhook that will perform a HTTP POST, GET, PUT, or DELETE to the destination.
Helpful Development Tools
Webhook properties documentation
The IoT Device Particle.publish()
Using a Particle.publish() and a webhook is the most secure and efficient method of sending data from your Particle device to the final destination. Use it in place of TCPClient, or any other option. Keep the data packet you sent as small as possible, but when it makes sense to post multiple data values, then do so. Push out the dynamic data to the webhook, and keep the remainder to a minimum. An example of a Particle.publish() to a webhook is:
char data[50];	// See the serial output for the exact size required (and then pad it for large #'s).
float f = 23.435;
uint8_t i = 85;
char c[5] = "aBcd";
// snprintf() format codes: https://cplusplus.com/reference/cstdio/printf/
// "event_name" is the webhook "Event Name"
snprintf(data, sizeof[data], "{ \"f\": \"%f\", \"i\": \"%u\,\"c\":\"%s\"" }", f, i, c);
Particle.publish("event_name", data, PRIVATE);
Serial.printlnf("Sending to Blynk: '%s' with size of %u bytes", data, strlen(data));
NOTE: The variable names of 'f', 'i', and 'c' were strategically chosen to minimize the transmitted payload. The values for 'f', 'i', and 'c' are accessible to the webhook as '{{f}}', '{{i}}', and '{{c}}'. Notice in the code above the extra double quotes around the "%s" format code that are escaped. You will need those double quotes for a string or character array.
Webhook
Once the raw data has been pushed from the Particle device to the webhook, it is the job of the webhook to take that data, acquire a timestamp, and format an HTTP POST/GET/PUT/DELETE for the destination. The values for 'f' and 'i' are accessible to the webhook as '{{f}}' and '{{i}}'. Additionally, the following data from the Particle.publish() is available to the webhook: {{{PARTICLE_DEVICE_ID}}}; {{{PARTICLE_EVENT_NAME}}}; {{{PARTICLE_EVENT_VALUE}}}; {{{PARTICLE_PUBLISHED_AT}}} See webhook advanced topics for more information. Note that the triple braces to avoid HTML escaping of the values, and these do NOT have double quotes added on either side.
Before you start trying to push the data from your IoT device to the destination, it is strongly recommended you push simulated data with a service such as Postman to confirm your understanding of the format the destination requires.
Start creating a webhook by logging into your Particle account, and then going to integrations (webhooks). Click on the 'NEW INTEGRATION' link to create a new webhook. Choose the option 'Webhook'. Enter a unique 'Event Name' for the webhook, and the 'URL' for the destination. Choose a 'Request Type' from the options of HTTP POST/GET/PUT/DELETE. For 'Request Format', the best choice varies by the type of HTTP action.
The New Integration (webhook) page has a lot of options under the 'Advanced Settings'. Look at the 'CUSTOM TEMPLATE' option at the top of the page because this will let you see the JSON created from the 'WEBHOOK BUILDER' settings. If you can't find what you need in output from the 'WEBHOOK BUILDER', just edit the JSON under 'CUSTOM TEMPLATE'. Most of the work is formatting your POST/GET/PUT to achieve pushing data to your destination, so use a service like Postman to confirm the format your destination requires, and then focus on using the variable substitution '"key":"{{{myVar}}}"' feature within the webhook to format the data from your IoT device into what is needed by your destination.
HTTP POST
HTTP GET
When the "Request Type" is GET, the data can only be sent as "Query Parameters".
After choosing the HTTP action of 'GET', the 'Request Format' option will be set to 'Query Parameters'. Under 'Advanced Settings' choose the 'QUERY PARAMETERS' option of 'Custom'. From here, you can add each query parameter required for the GET request. Notice from the Blynk webhook example below how the variables names 'V0' and 'V1' sent from the device using Particle.publish() are referenced. The 'token' is a URL argument that is specific to Blynk and other cloud services will have their own specific authentication requirements.
HTTP PUT
HTTP DELETE
TCPClient
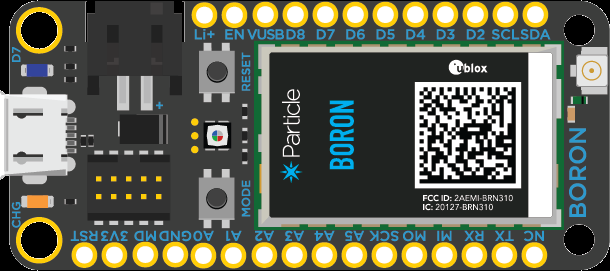
The TCPClient API allows your Boron/Argon device to connect to a specified IP addreess and port and execute a HTTP GET / PUT / POST. WARNING: This can use a lot of cellular data! Using Particle.publish() along with a webhook is more data efficient.
Other Resources
An excellent tutorial created by rickkas7 for advanced webhooks is worth reviewing.
Do you need help developing or customizing a IoT product for your needs? Send me an email requesting a free one hour phone / web share consultation.
The information presented on this website is for the author's use only. Use of this information by anyone other than the author is offered as guidelines and non-professional advice only. No liability is assumed by the author or this web site.
.png)
.png)
.jpg)

 (4).png)


.png)




.jpg)
.png)
.png)