Particle Projects
April 2020
Particle Particle Webhook to Adafruit IO
Adafruit IO is a free cloud based IoT sevice for the display of IoT data to a custom dashboard. Multiple feeds are supported, they may be public or private, and you can configure triggers to react to specific limits relative to your data values. The notifications feature will alert you when no new data has been received for your feed after the specified amount of time. Integrations to IFTT and Zapier are included. The free account is limited to 10 feeds (channels) and 60 messages per minute.
Adafruit IO feeds tutorial
Adafruit IO Feed REST API Docs
Adafruit IO Python Client Feed Docs
Creating an Adafruit IO Feed
Adafruit creates very good guides and documentation, so follow the links above to create an account and setup a feed. The information below should fill in the missing information required to configure a Particle Webhook to Adafruit IO. General information about creating a Webhook can be found on my Particle software details page.
NOTE: When creating a new feed in Adafruit IO, make sure you use a hyphen "-" rather than an underscore "_" to avoid the underscores from being automatically changed to hyphens after you create the feed.
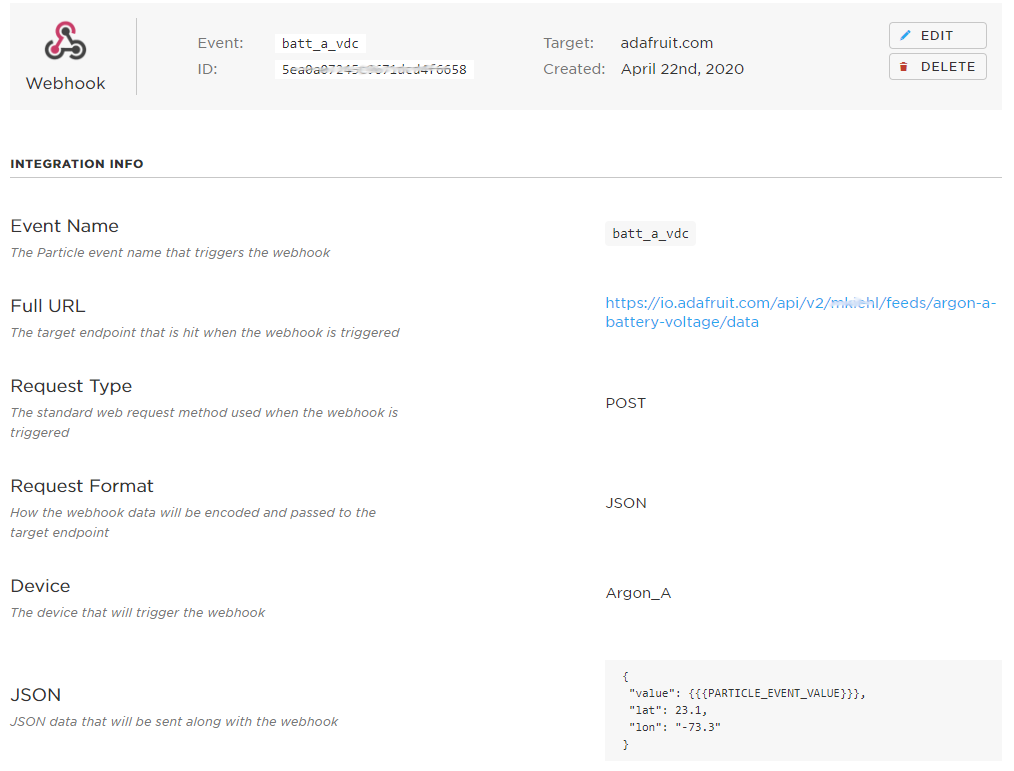
The Adafruit IO POST to Create Data is looking for a JSON key called value. The keys lat and lon are optional.
https://io.adafruit.com/api/v2/{username}/feeds/{feed-name}/data

{
 "value": 42,
 "lat": 23.1,
 "lon": "-73.3"
}


curl -H "Content-Type: application/json" -d '{"value": 42, "lat": 23.1, "lon": "-73.3"}'  -H "X-AIO-Key: {io_key}" https://io.adafruit.com/api/v2/{username}/feeds/{feed_key}/data
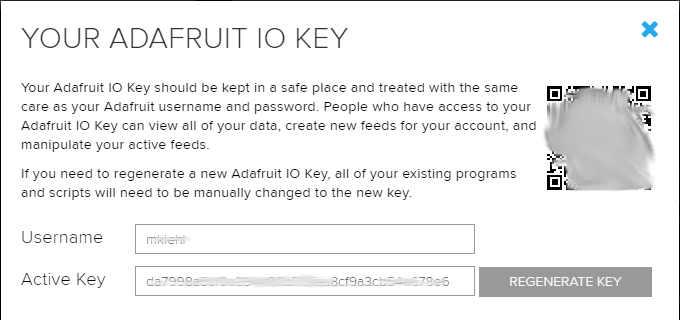
Replace {username} with the Adafruit IO username you see when you click on the 'Adafruit IO Key' link on the dashboard page. Replace {feed-name} with the name you entered when you created the feed (also shown at the top of the dashboard as {username}/Feeds/[feed-name}). Configure the header with the content shown below, substituting the {active key} with the active key shown when you click on the 'Adafruit IO Key' link on the dashboard page.
Content-Type:  application/json
X-AIO-Key:  {active key}
The POST to Adafruit IO using Insomnia shown below helps to clarify the required information for the POST.
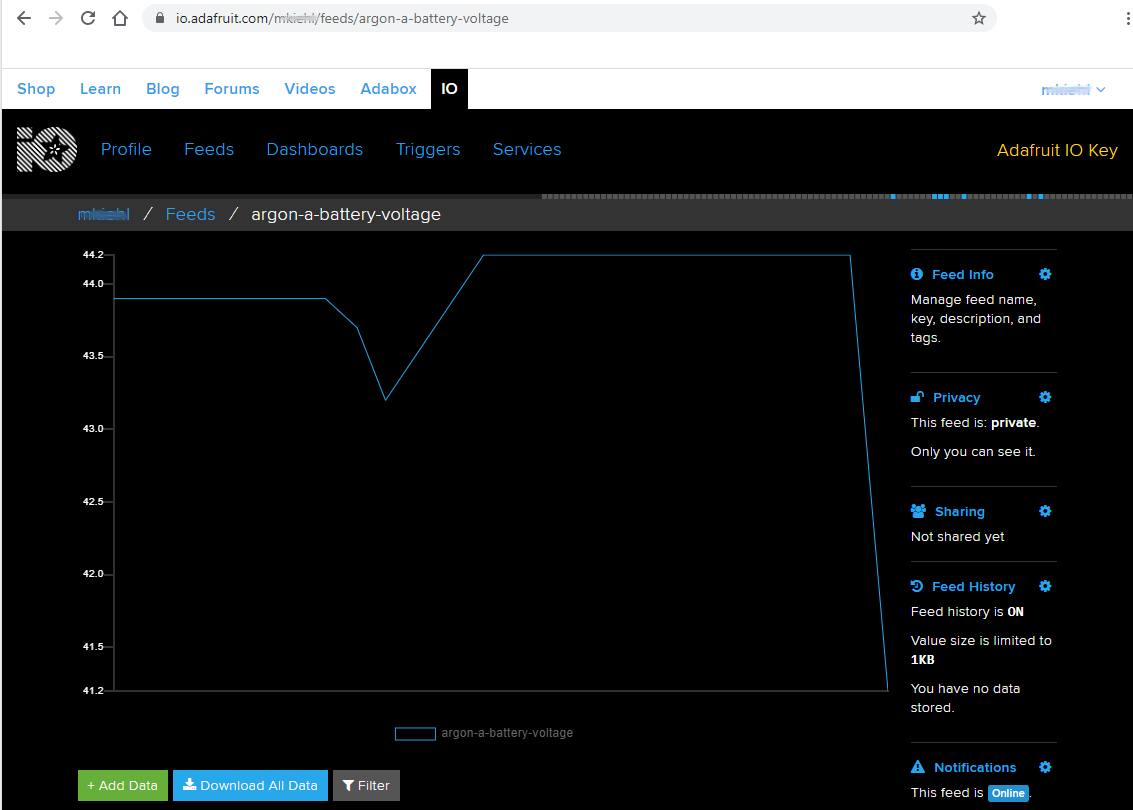
The result on the Adafruit IO dashboard is shown below:
Creating an Adafruit IO Webhook
A Webhook feed JSON body must include a value parameter named either value or payload. It may optinally include keys lat, lon, and ele.
Other Things You Can Do
The Adafruit IO has many more features, such as creating a Group of Feeds, configuring Triggers, adding Blocks to a Dashboard, etc. See the API Documentation for more information.
Related Links
freeCodeCamp - How to Build Air Quality Sensor for Home
Particle Community - Adafruit IO Webhooks
Do you need help developing or customizing a IoT product for your needs? Send me an email requesting a free one hour phone / web share consultation.
The information presented on this website is for the author's use only. Use of this information by anyone other than the author is offered as guidelines and non-professional advice only. No liability is assumed by the author or this web site.


.jpg)

 (4).png)


.png)




.jpg)
.png)
.png)