Particle Projects
May 2020
Particle Blynk IoT Mobile App
This article was written prior to the release of the next generation Blynk IoT Platform mid 2021.
Blynk is an IoT Platform that provides connectivity betweeen IoT devices and mobile apps via the Blynk Cloud. Note that the Blynk Cloud does NOT provide any dashboards or other other access to your Particle device data. The primary interaction between your Particle device and Blynk is via the Blynk mobile app.
You may build non-commercial mobile apps for up to 10 devices for free. Commercial pricing is based on the number of mobile phone apps / devices / users, but in general reasonably and competitively priced beginning at 100 devices. You may use the Blynk Cloud for the connection between the IoT devices and the mobile apps, or you may host your own instance of Blynk. You may deploy your own Blynk Server.
It is possible to use the Blynk mobile app to communicate directly with and IoT device via Bluetooth & BLE 4.0. Bluetooth 4.0 (Smart, Low-Energy) modules are supported on both iOS and Android. Bluetooth 2.0 (Classic, Serial Port Profile) modules are only supported on Android.
The free "Prototype" plan limits usage through Energy points. Each Widget created uses energy, but it is returned when the Widget is deleted. You create a new "Prototype" plan account by downloading the Blynk App and then creating a login from that point, NOT by connecting to the Blynk website. The Blynk website provides documentation and a community forum.
Some Interesting Widgets
- GPS Trigger - event triggered when you arrive or leave within a radius of a designated GPS location. Uses phone GPS.
- Webhook - communicates with 3rd party HTTPS API.
- Bridge - direct IoT device to IoT device communication (phone app not involved nor required). Virtual I/O line/pin passing possible.
- Terminal - send text between phone app and IoT device.
Working with Blynk
Blynk activity and resources are focused on the Blynk mobile app builder. For example, the help documents for the widgets are generally more informative than what you will find online. Adding widgets and building an app in Blynk is fairly intuitive.
Blynk has libraries for may types of devices, making it very easy to generate the code on those devices to work with Blynk. However, it is also possible to use the Blynk HARDWARE MODEL options of Generic Board, HARDWAREIO, or a device with similar characteristics / hardware to the device you are using and still use Blynk. In my opinion, it is easier to use Blynk for several different devices by using the Generic Board HARDWARE MODEL option and Blynk virtual pins for the inputs and outputs. In this way, you then adjust the code and the values to the virtual pins based on the device, without confusion over pin mapping to the Blynk widgets on the phone app.
It is important to understand two facts about the Blynk app and the Particle device it connects to. The app will not request or receive any data from the Blynk Cloud or the Particle device unless it is running, and the Particle device is connected to the internet so that it can communicate with the Blynk cloud.
When a widget on the Blynk app reads data, it can be configured to either PULL data, or receive data via a PUSH from the Particle device.
- PULL The BLYNK_READ() function works with a Blynk widget that pulls data from the Particle device via this function. The pull request from the Blynk app widget is assigned an interval (frequency) that specifies how frequently the app will execute the BLYNK_READ() funcion to fetch an updated value (in real time from the device). The Blynk app will only request data when the app is open (not when running in the background or closed). Note that data is NOT stored on the Blynk cloud.
- PUSH The Particle device sends data to the Blynk Cloud where it is stored and then made available to the Blynk app when the app is running.
docs examples REST API docs community
Data Usage & Blynk Message Frequency Limits
The Blynk Cloud accepts 1 message per minute per virtual pin. When you use the Blynk library, your message size is determined by the methods that Blynk library employs. Blynk sends a 90 byte "heartbeat" message at an adjustable interval (default 10 seconds) to keep the network connection alive. That heartbeat message alone can consume 22.7 MB/mo of cellular data (Particle's Starter plan limit is 3.0 MB/mo). Changing the heartbeat rate to every 90 sec reduces the monthly cellular data usage to 2.7 MB/mo. Hopefully the Blynk "heartbeat" message is not sent when a data message from something like a Blynk.virtualWrite() is sent.
// Set Blynk hertbeat interval (in seconds)
#define BLYNK_HEARTBEAT 90
Argon/Boron Blynk App
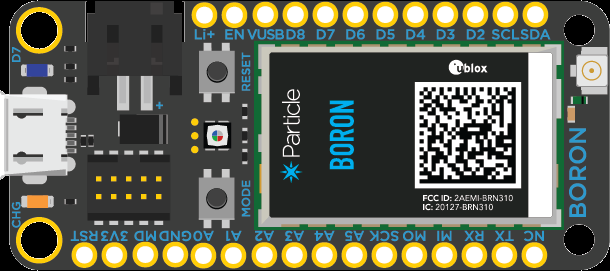
The following tutorial will create a Blynk app for a Particle device using the Generic Board HARDWARE MODEL option. The widgets have been carefully chosen to provde a good example of how to use any of the widgets.
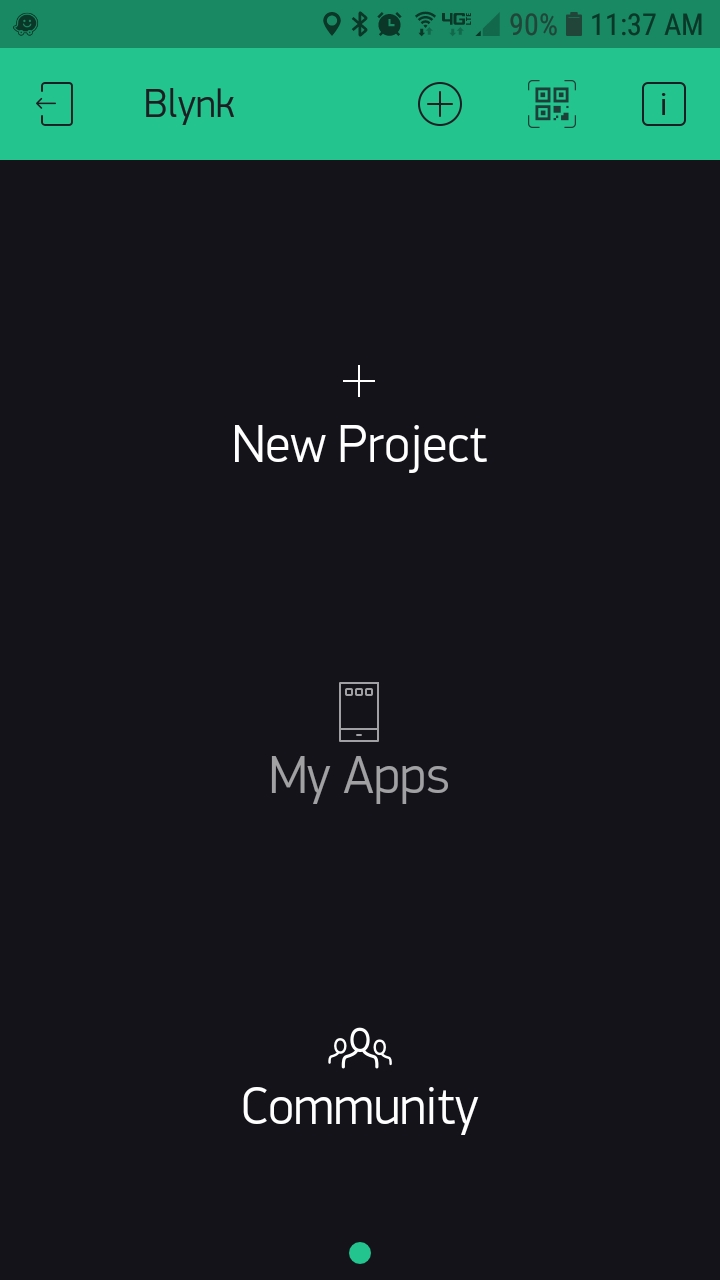
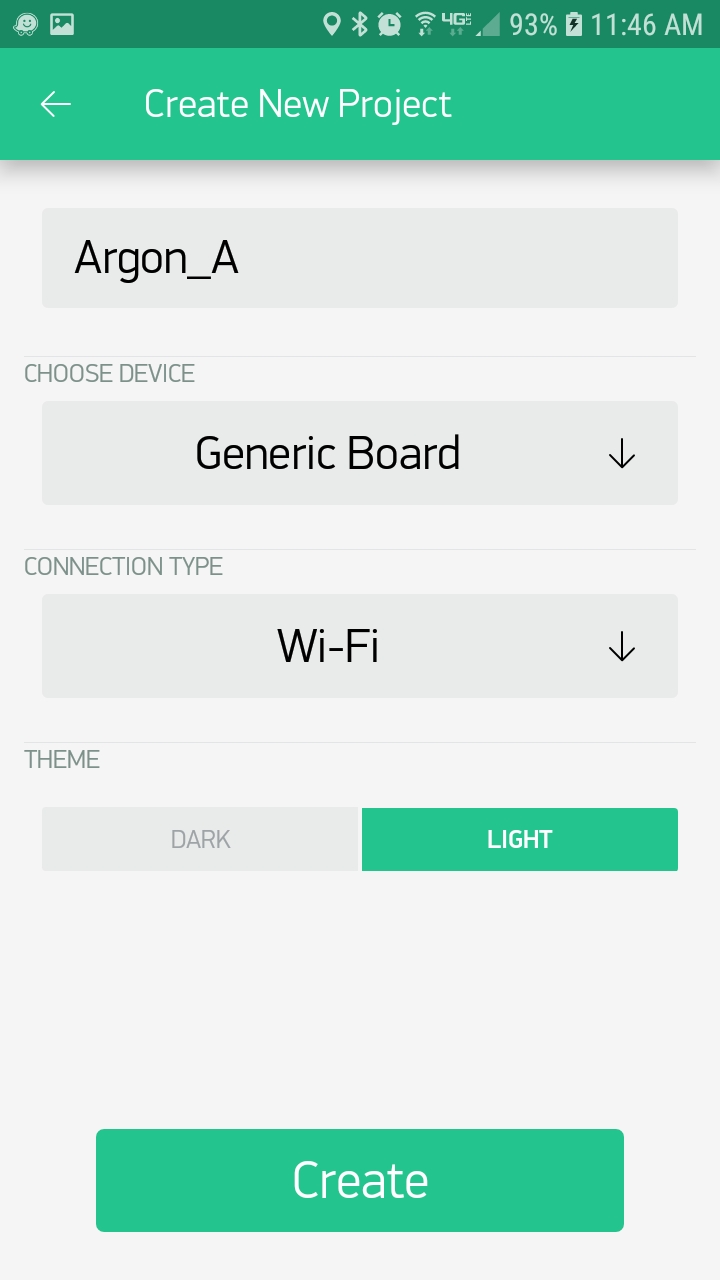
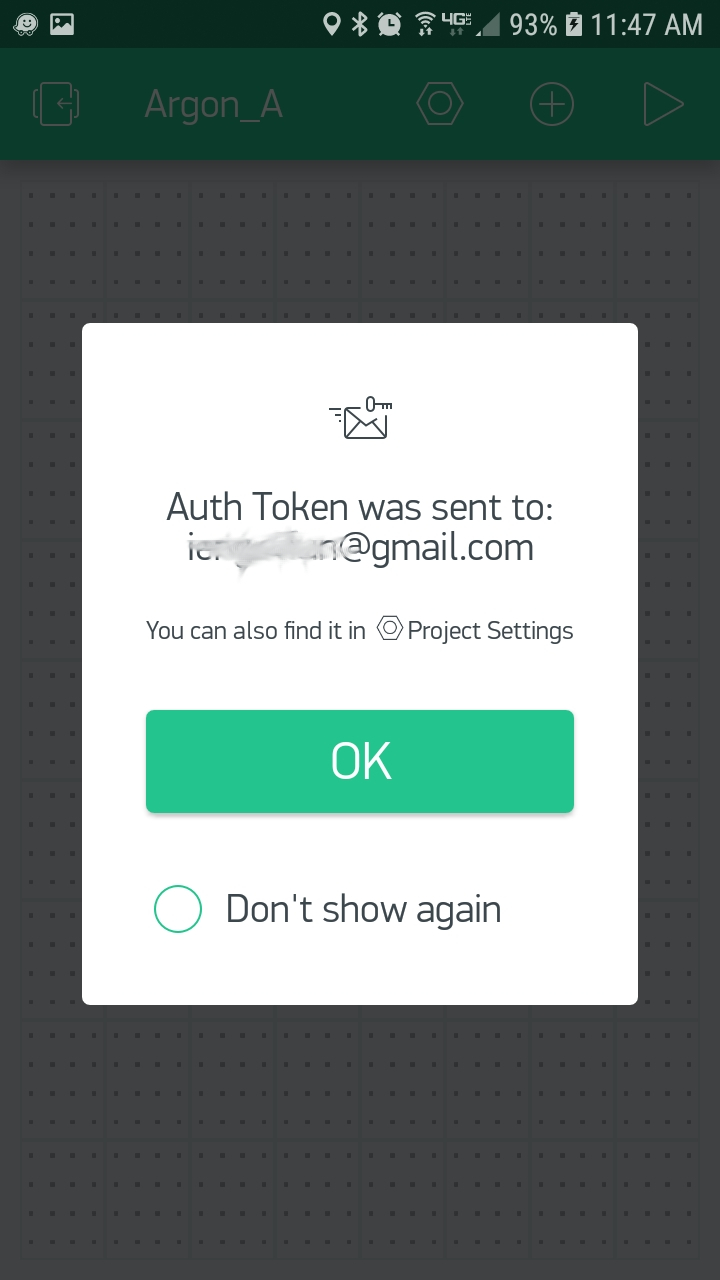
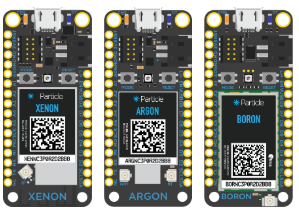
Create a free Blynk account by first downloading the Blynk app (by Blynk Inc.) and then using the app to create an account. Create a new project, enter a Project Name, and then under CHOOSE DEVICE choose Generic Board. Note that the Particle devices Core, Electron, and Photon are listed, but not the Argon, Boron, or Xenon. The Xenon cannot be connected without a WiFi, Ethernet, or other shield that provides connectivity to the internet. Under the CONNECTION TYPE option, choose Wi-Fi and then click the Create button. An Auth Token will be emailed to the email address you provided when you signed up with Blynk, and it will be used later when you write your Particle Argon/Boron code.
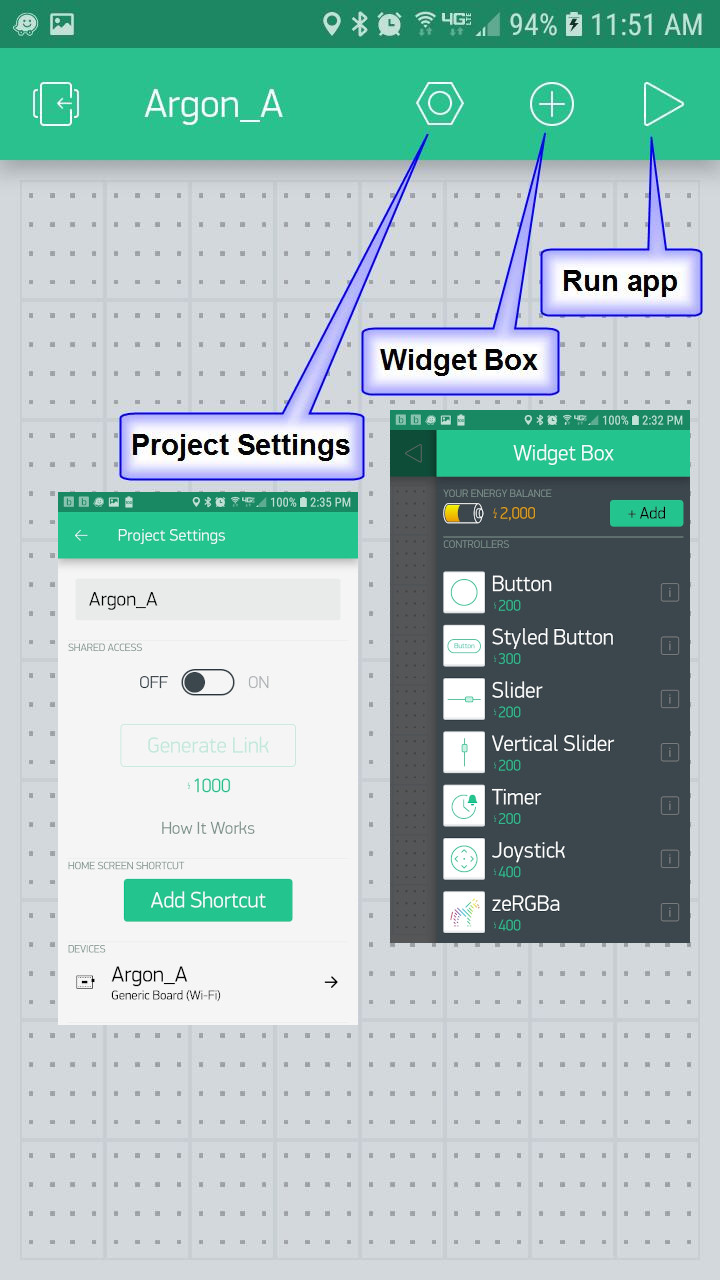
The next screen is where you add Widgets (controls). You also have access to Project Settings, the button to run the app, and a project overview window. Each Widget added must be configured, and then the code on your Particle device modified to accommodate it.
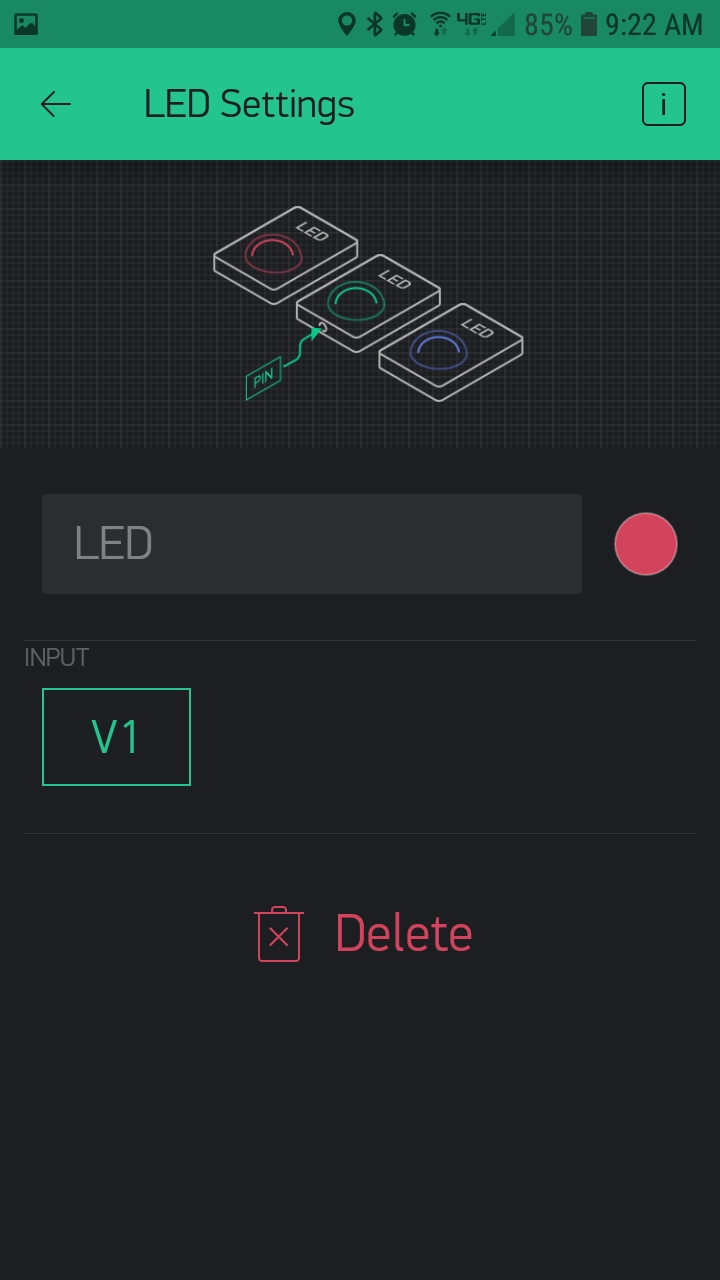
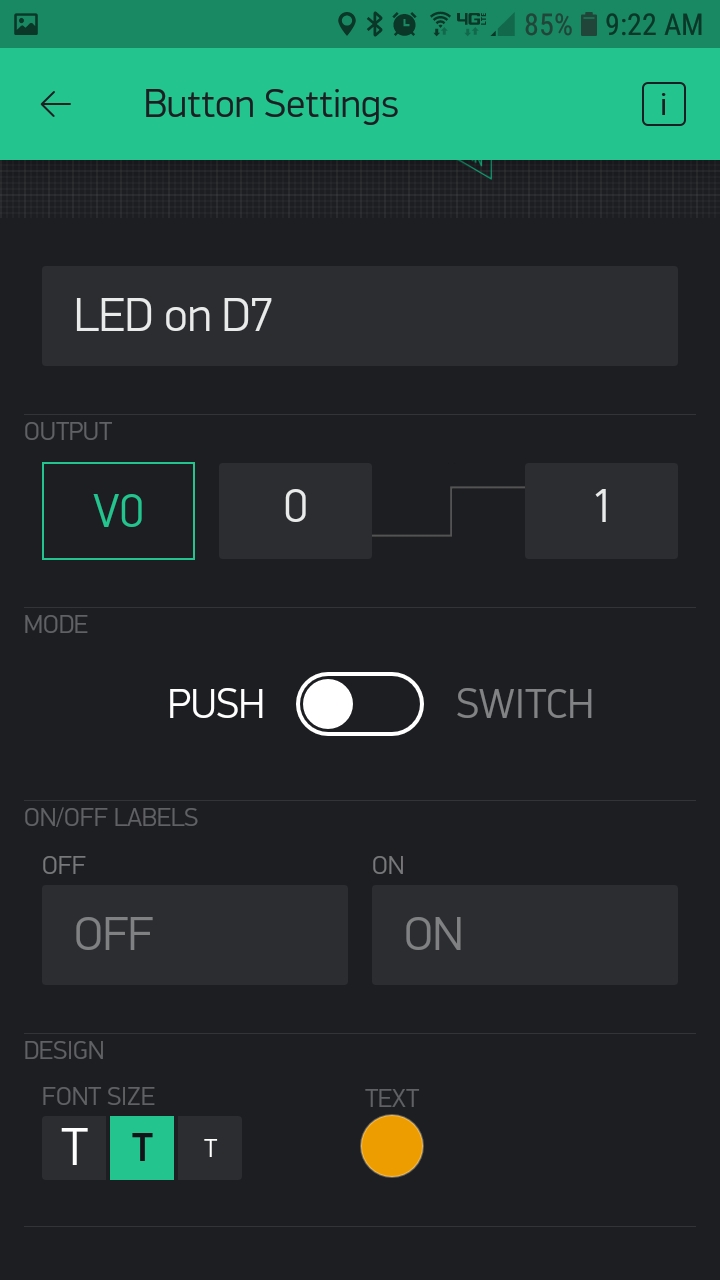
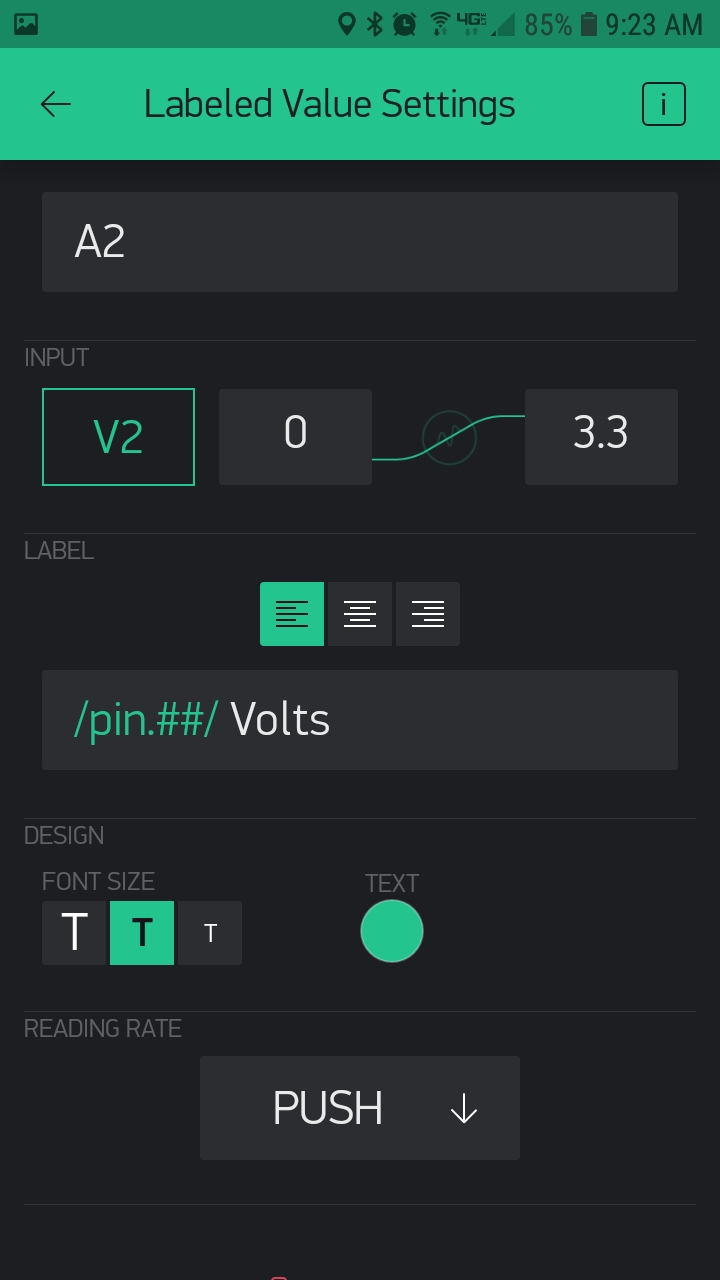
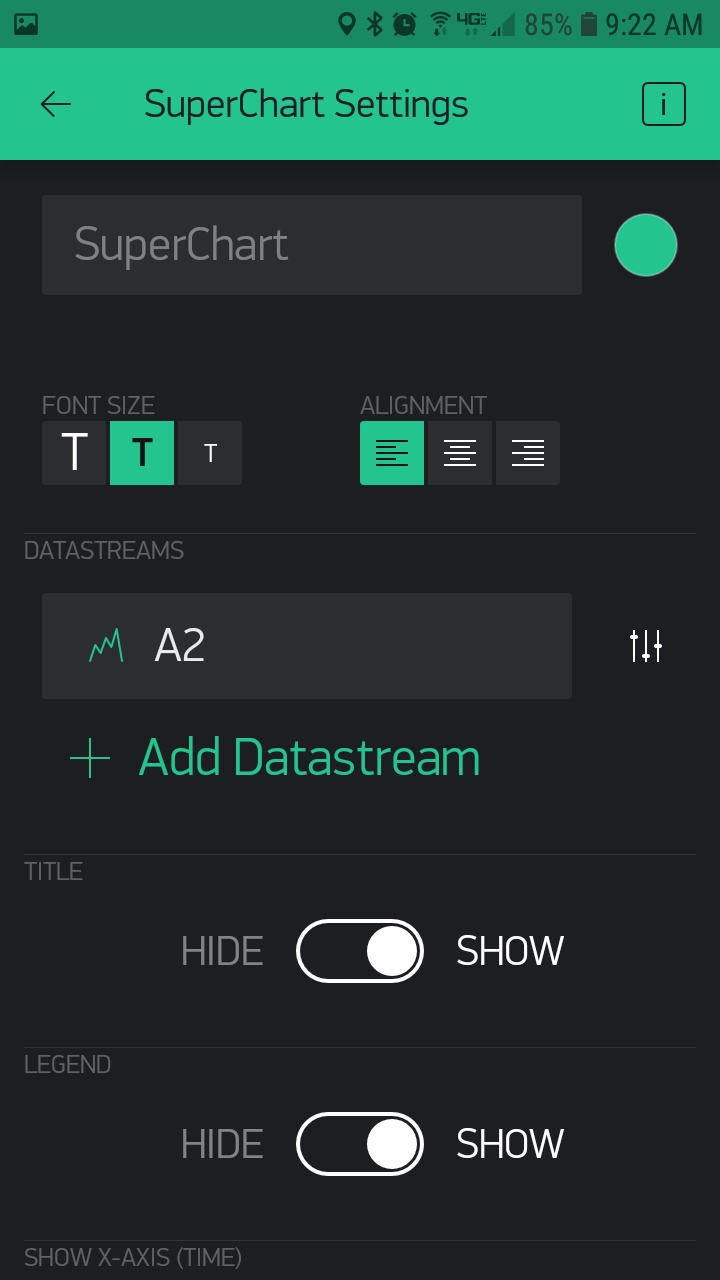
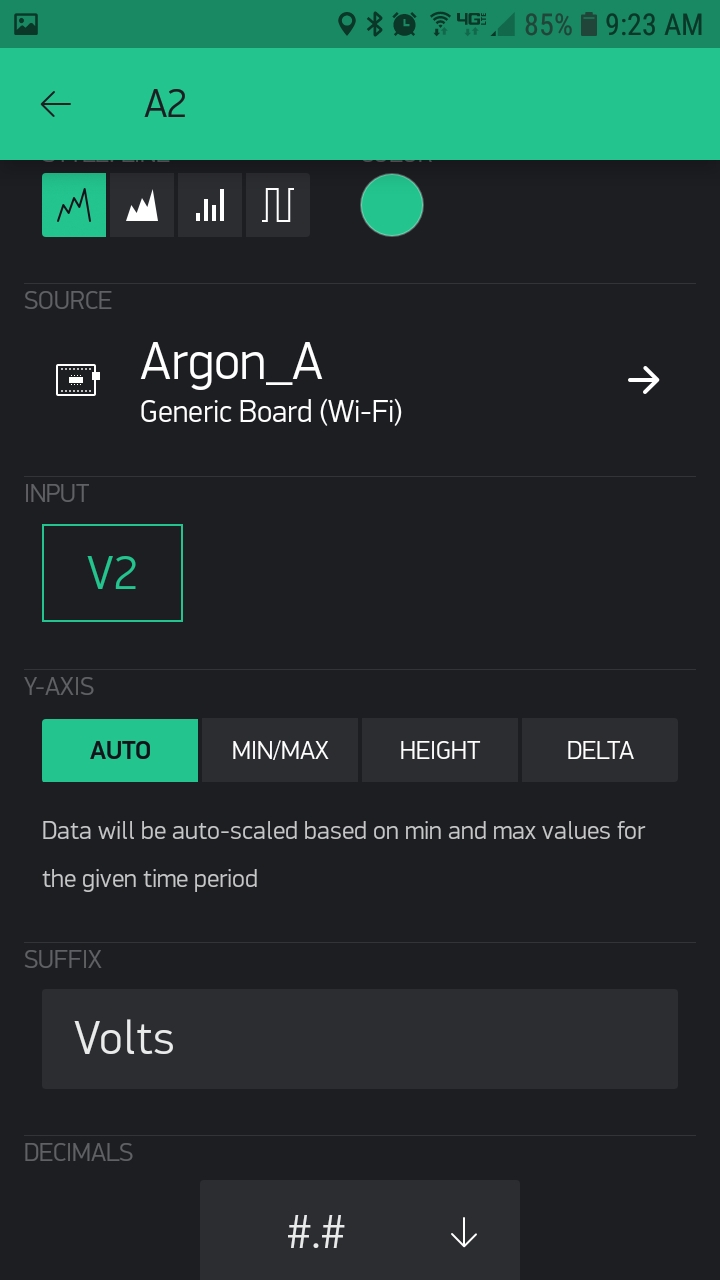
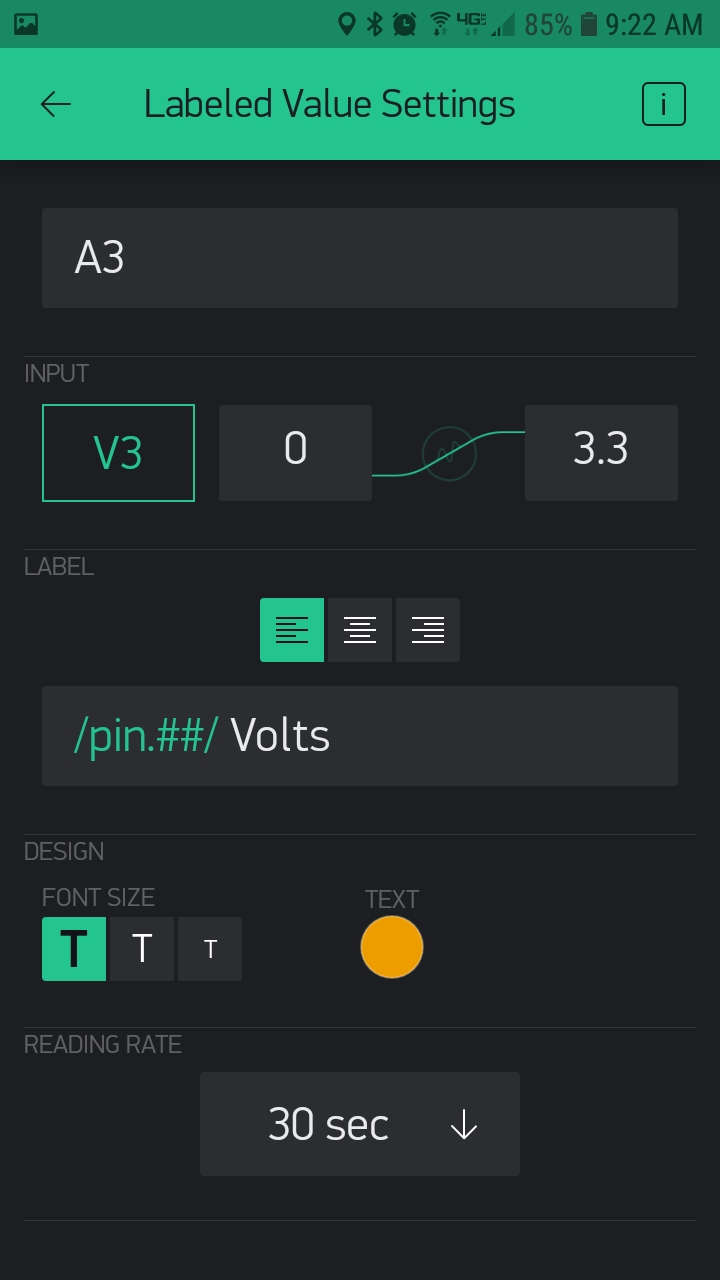
Add the five widgets named below, and then configure them as shown in the screen shots.
Build the Blynk App
LED, Button, Labeled Value widgets:
SuperChart widget:
Labeled Value widget
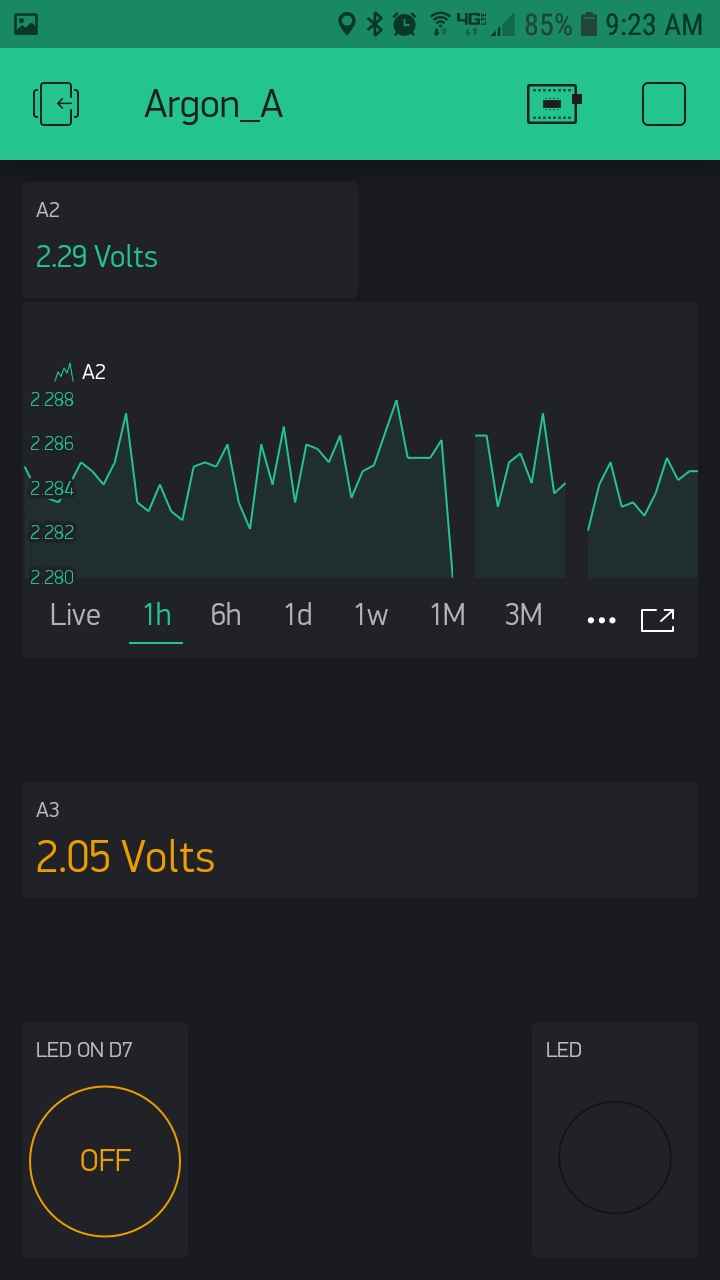
The Final Blynk App
Analog input A2 values are displayed with a Labeled Value widget (updated by a PUSH in the Particle device code) to show the most current value, and the SuperChart widget shows the time series data in a chart. Analog input A3 is shown in a Labeled Value widget that is updated every 30 seconds by a timed PULL. The Particle device blue LED on D7 is turned on and off by the Button widget. The LED widget (actually a RGB) is turned on and off by a PUSH command from the Particle device code.
The Particle Device Code
/*
 * Project      blynk
 * Description: Demonstrate Blynk app with Particle Argon device.
 * Author:      Mark W Kiehl / Mechatronic Solutions LLC
 * Date:        May 2020
 */

/////////////////////////////////////////////////////////////////////////
// Blynk

//#define BLYNK_DEBUG // Optional, this enables detailed output to the serial monitor
//#define BLYNK_PRINT Serial // Defines the object that is used for printing
#define BLYNK_NO_BUILTIN   // Disable built-in analog & digital pin operations (saves memory)

// Load Particle library: Blynk
#include <blynk.h>

// Blynk authorization token
char auth[] = "your-blynk-auth-token-from-the-mobile-app";

/////////////////////////////////////////////////////////////////////////
const unsigned long TIMER_INTERVAL_A2_MS = 15000;
unsigned long timerLastA2 = 0;

const unsigned long TIMER_INTERVAL_D4_MS = 100;
unsigned long timerLastD4 = 0;
byte stateD4 = LOW;
byte lastStateD4 = LOW;


void setup() {
  Mesh.off();

  pinMode(D7, OUTPUT);
  pinMode(A2, INPUT);
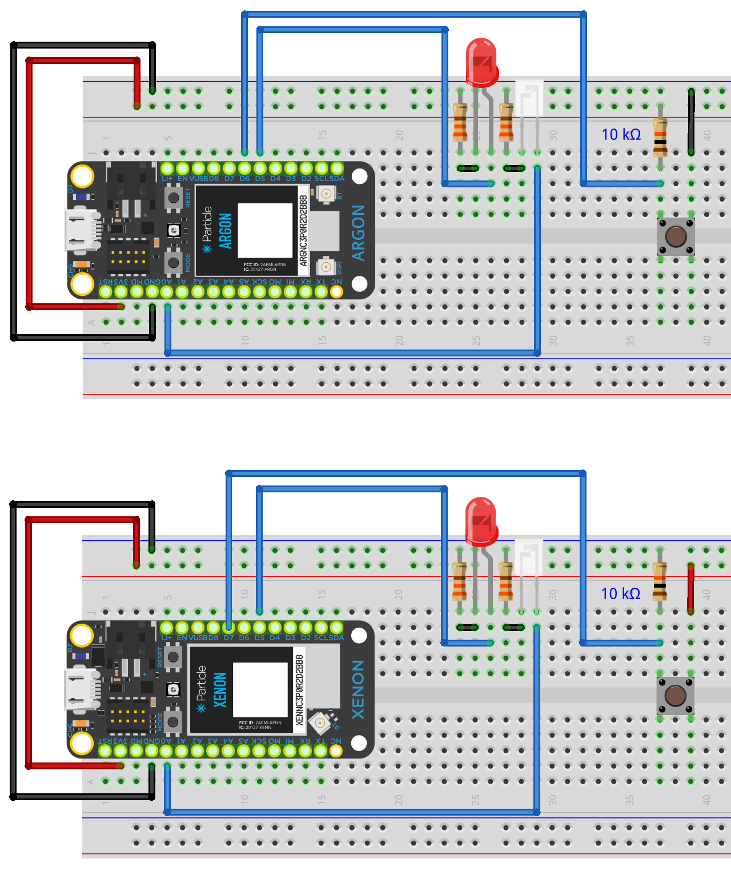
  pinMode(D4, INPUT);

  Serial.begin();
  waitFor(Serial.isConnected, 30000);
  delay(2000);
  Serial.printlnf("System version: %s", (const char*)System.version());

  Blynk.begin(auth);

  Serial.println("Setup complete");
} // setup()


/*
BLYNK_CONNECTED() {
  // Requires:  #define BLYNK_PRINT Serial
  Serial.println("BLYNK_CONNECTED");
} // BLYNK_CONNECTED()

BLYNK_DISCONNECTED() {
  // Requires:  #define BLYNK_PRINT Serial
  Serial.println("BLYNK_DISCONNECTED");
} // BLYNK_CONNECTED()
*/


BLYNK_WRITE(V0) {
  // Attach a Button widget to the virtual pin 0 (V0), set the
  // data mapping from 0 to 1, and set the mode to PUSH.

  // Read the state of V0 (on the mobile phone app) and update the
  // Particle device digital ouput D7 state to match.
  // D7 is connected to the Particle Argon/Boron built-in blue LED.
  if (param.asInt() == 1) {
      digitalWrite(D7, HIGH);
  } else {
    digitalWrite(D7, LOW);
  }
} // BLYNK_WRITE()


void timerA2() {
  if (timerLastA2 > millis())  timerLastA2 = millis();
  if ((millis() - timerLastA2) > TIMER_INTERVAL_A2_MS) {
    // Blynk PUSH widget read example.
    // The Particle device sends data to the Blynk Cloud
    // where it is stored and then made available to the
    // Blynk app when the app is running.

    // In the Blynk app, configure a SuperChart connected
    // to virtual pin V2.

    // The value of A2 below is converted and sent to the
    // Blynk cloud as volts.  The values of A2 will range
    // between 0.0 and 3.3 volts.

    double mV_to_fs = 0.001;  // Conversion factor for mV to full scale (FS) units.  1000 mV = 1 V
    double fs_val = double(analogRead(A2)) * 3300.0 / 4096.0 * mV_to_fs;
    Blynk.virtualWrite(V2, fs_val);
    Serial.printlnf("A2 = %0.1f V", fs_val);

    timerLastA2 = millis();
  } // timer
} // timerA2()


void timerD4() {
  // LED widget & Partice device D4

  // Add an LED widget to the Blynk app and configure the input
  // to virtual input 1 (V1).
  // The LED widget is illuminated by when it's value is set to
  // 255, and turned off when the value is 0.

  // Connect digital input D4 to a pushbutton that is pulled
  // high (3.3 V) when the button is pushed.

  stateD4 = digitalRead(D4);
  // Debounce timer for digital input D4.
  if (timerLastD4 > millis())  timerLastD4 = millis();
  if (stateD4 != lastStateD4 && (millis() - timerLastD4) > TIMER_INTERVAL_D4_MS) {
    lastStateD4 = stateD4;
    // Update V1
    if (lastStateD4 == HIGH)
      Blynk.virtualWrite(V1,255); // turn the LED on
    else
      Blynk.virtualWrite(V1,0);   // turn the LED off
    timerLastD4 = millis();
  } // timer

} // timerD4()


BLYNK_READ(V3) {
  // The BLYNK_READ() function works with a Blynk widget that
  // pulls data from the Particle device via this function.
  // The pull request from the Blynk app widget is assigned
  // an interval (frequency) that specifies how frequently
  // the app will execute the BLYNK_READ() funcion to fetch
  // an updated value (in real time from the device).
  // The Blynk app will only request data when the app is open
  // (not when running in the background or closed).
  // Note that data is NOT stored on the Blynk cloud.

  // In the Blynk app, configure a Labeled Value Display
  // widget to virtual pin V2, and set the data mapping
  // for values between 0 and 3.3.
  // Assign "Volts" to the widget label and set it to
  // show two decimal places (/pin.##/ Volts).
  // Set the Reading Rate to pull every 10 sec.

  double mV_to_fs = 0.001;  // Conversion factor for mV to full scale (FS) units.  1000 mV = 1 V
  double fs_val = double(analogRead(A3)) * 3300.0 / 4096.0 * mV_to_fs;
  Blynk.virtualWrite(V3, fs_val);
  Serial.printlnf("A3 = %0.1f V", fs_val);
} // BLYNK_WRITE()


void loop() {

  Blynk.run();

  timerA2();

  timerD4();

} // loop()
Blynk REST API
The Blynk HTTP RESTful API allows you to access the Blynk Cloud, and the IoT hardware connected to a Blynk app. This may be used to externally acquire information about the IoT device / Blynk app, and to change the state and/or send data to the Blynk Cloud and/or the IoT device and and the Blynk app. I suspect that a REST API call to add/change a value adds/updates a value in the Blynk cloud, and that in turn causes a corresponding added/updated value at the Blynk phone app. In my Argon_A example, I was able to PUT a value of 1 to virtual pin V0 and it caused the button widget to be depressed.
Invalid Commands for blynk.h Library
#define BLYNK_NO_FLOAT // Disable float operations
Related Links
Particle Mesh + Blynk Tutorial by Jared Wolff
Blynk Particle library on GitHub
Blynk app BLE communication to Arduino 101 by Noah Huber-Feely
Do you need help developing or customizing a IoT product for your needs? Send me an email requesting a free one hour phone / web share consultation.
The information presented on this website is for the author's use only. Use of this information by anyone other than the author is offered as guidelines and non-professional advice only. No liability is assumed by the author or this web site.
.jpg)

 (4).png)


.png)




.jpg)
.png)
.png)